DICOM and ACR/NEMA 16-bit medical image files are automatically calibrated when they are opened since these files include information which indicates the physical size (in mm) that each image pixel represents. To measure regions, pixel density profiles, distances and areas on these images simply draw a region or select one of the measurement tools. Madena initially displays measurements in pixels. To display distances and area in cm and sq.cm, go to the "Image" menu and select the "by Square cm" item, or click on the "Calib"(rate) button and then immediately click "OK" to exit the dialog. All Region-of-Interest (ROI) and measurement tool readouts will change to cm and square cm.
![]() The more common PC file formats such as jpg, pict, gif, tiff etc... that you might obtain using a film scanner require manual calibration. The original films usually have a calibration ruler included in the image. Click the Measure button in Madena's control panel to display the diametric measurement tool. (You can control-click on this button for additional tools). Drag the tool's yellow control markers over the ruler in the image as illustrated below.
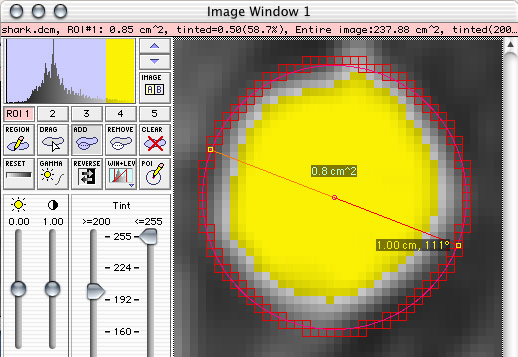
The more common PC file formats such as jpg, pict, gif, tiff etc... that you might obtain using a film scanner require manual calibration. The original films usually have a calibration ruler included in the image. Click the Measure button in Madena's control panel to display the diametric measurement tool. (You can control-click on this button for additional tools). Drag the tool's yellow control markers over the ruler in the image as illustrated below.
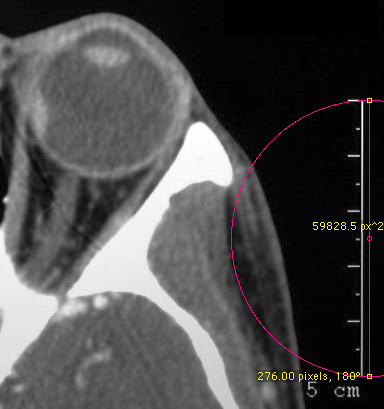
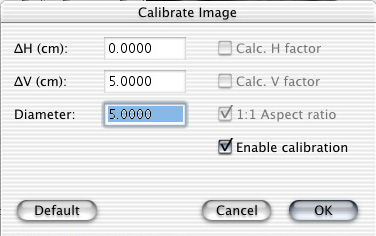
Click the Calibrate button in Madena's control panel (just below the Measure button) to display the calibration dialog. Enter the ruler distance (5.0 cm in this example) and then click OK to exit the dialog.
Additional measurement tools and various options are available from the Measurement Tools menu which is accessed from the Image menu or by control-clicking on the Measure button.
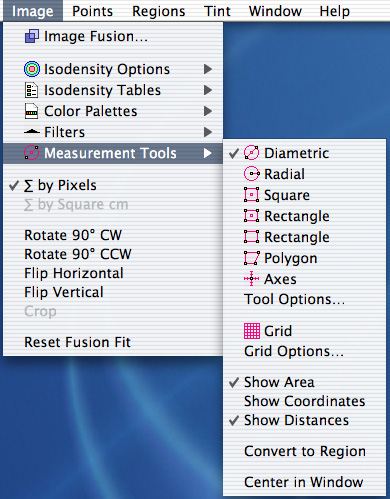
The measurement tool options include
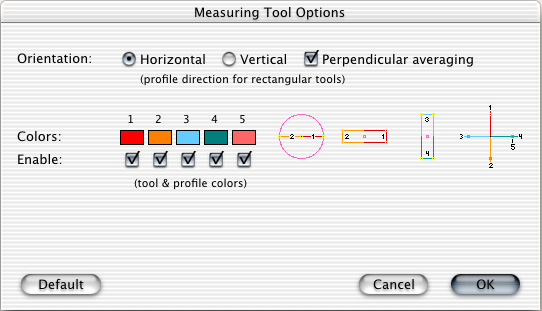
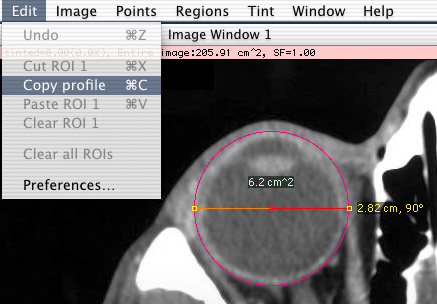
The tool area and distance measurements can be copied to the clipboard from the Edit menu when a measurement tool is active (you can not copy a region-of-interest to the clipboard when a measurement tool is active, the measurement tool takes precedence).

The 16-bit pixel density profile under the indicator line of a measurement tool can be copied to the clipboard by shift-clicking the Edit menu. In this example, the profile under the diametric tool bisector is copied to the clipboard. Each measurement tool produces a different kind of profile.